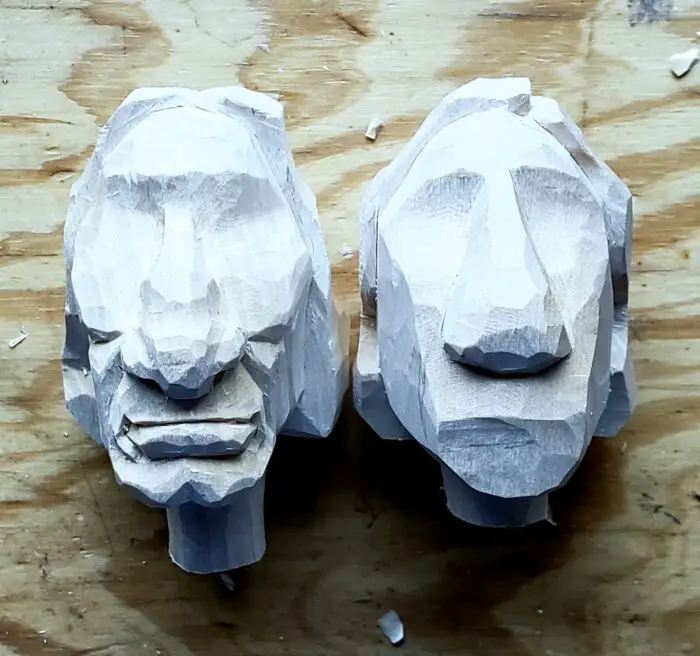
In part two we address the nose and the mouth. While doing this remember the actual anatomy of the facial muscles to get the best result. One can deviate a little but, in this case at least, distorting these details too much could result in something that’s not correct with the overall figure. Take your time, plan your cuts and, most of all, use reference material.
In the upcoming Part 3 we will take on the problem everyone seems to have trouble with….THE EYES! Relax! It’s not as hard as you think it is.
Having fun yet? Comments welcome.

Looking good. I never noticed the “anyways” 🤠
As always a great carving, iam glad you started a new project. And that you show us from day 1 how to do things.
Thank you for that.
Thanks for taking the time to educate us carvers. I find your videos of huge value. No one else of your carving caliber spends the quality time teaching and showing as you do.
I have been using your Old-Reliable type knife modifications for a number of years now. It is my go-to knife for roughing out and pretty much everywhere that doesn’t need a tight curve. I do get grief from other carvers but I am carving away as they keep trying to sharpen their knives by stropping, stropping, stropping. Also, following your suggestions I keep a more narrow blade handy for tight curves, etc.
I see on this video that the blade you are using must have three (instead of the standard 2) cut-outs for the handle nubs. Perhaps this allows you to push the blade forward a little more. Is that correct?
Thanks.
Caro Lynn,
sei una miniera inesauribile di tecnica e consigli.
Quel poco che riesco a fare è tutto grazie ai tuoi tutorial, mi hai aperto un nuovo mondo
Grazie
saluti dall’Italia
Vincenzo