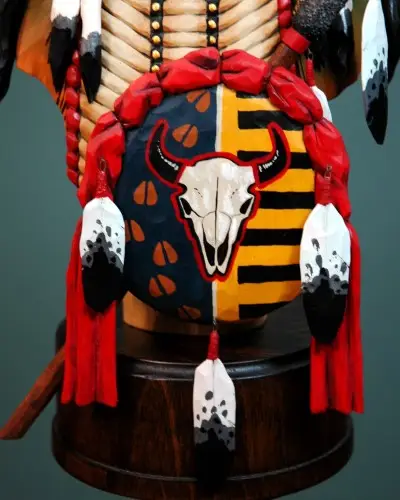
Now I realize not all carvers are great painters. I will try to help you as much as I can but if you look closely at the photos I think you can pretty well figure things out. So lets take the hard parts 1 at a time. But first, remember that I paint with the wood being damp. This allows the colors to soak in gives the piece a very natural appearance. The burn lines we’ve made will precent any paint from bleeding over into adjoining areas so that will not be a problem for you. So the first thing you want to do is to spray the piece you’re painting with clean water and allow it to soak in.
The Shirt, Beaded shirt strips, and Chest Plate: The shirt is first painted with Raw Sienna. Before that color dried I used a color Hunter Green to to paint over the Sienna, bleeding it out to the original color. You can see the effect of this on the 4th roll of the photos below. I’d suggest you try this on some scrap wood first.
For the Chest Plate I paint the larger Hair-Pipe beads white and while the paint is still damp paint the ends of the beads lightly with Yellow Ochre. This is add a shade of color ad the ends.
I paint the beading areas Black and once that dries use a small dowel or toothpick to dot the top of each bead with straight color. In this case Red for the outer beads and Gold for the inner.
Go ahead and paint the beaded shirt strips a couple coats of straight White.
The Neck Chocker. Use the same colors and technique as with the chest plate. The Silver shell is first painted Silver and then using Midnight Blue shade it from the middle..dark to light. The leather tie Dark Brown.
The Spear. Paint the spears shaft brown. Using some Mod Podge paint a heavy coat on the wrapped end as shown in the photo. The using some texturing material, i.e., very small gravel, sprinkle that area and let dry overnight. For the spear tip paint that Silver mixed with a little Midnight Blue for a stone appearance. Straight Red on the thread wrapped areas.
The rest of the figure is painted on fairly straight colors that are pretty well shown in the photos so I won’t go into those areas.
Once all the figure is painted as is show in the picture where the pieces are laid out, It’s time to glue everything together and attach the figure to the base with some wood glue or epoxy. Super glue the small pieces allowing them to swing freely.
That’s it! I hope you had fun following along and hopefully picked up some tips on creating a Native American carving you can be proud of.
As I mentioned in the first segment, if you feel this topic has been of use to you a small donation for site maintenance would be appreciated. Not required by any means but just appreciated. Just hit the Donate buttom below. Thanks.
Comments welcome as always.
