With my Saddle now complete, I use a wood stain to color it and then paint the saddle blanket. Lastly a couple coats of Minwax Satin Finish varnish to finish.
To complete the Saddle, I use some thin strips of leather and a few brass decorative nails to make the leather ties as shown. I also use the leather to make the cinch which is attached to the saddle with some galvanized wired available at any local hardware store. Carefully drill some small holes where indicated to attach the cinch.
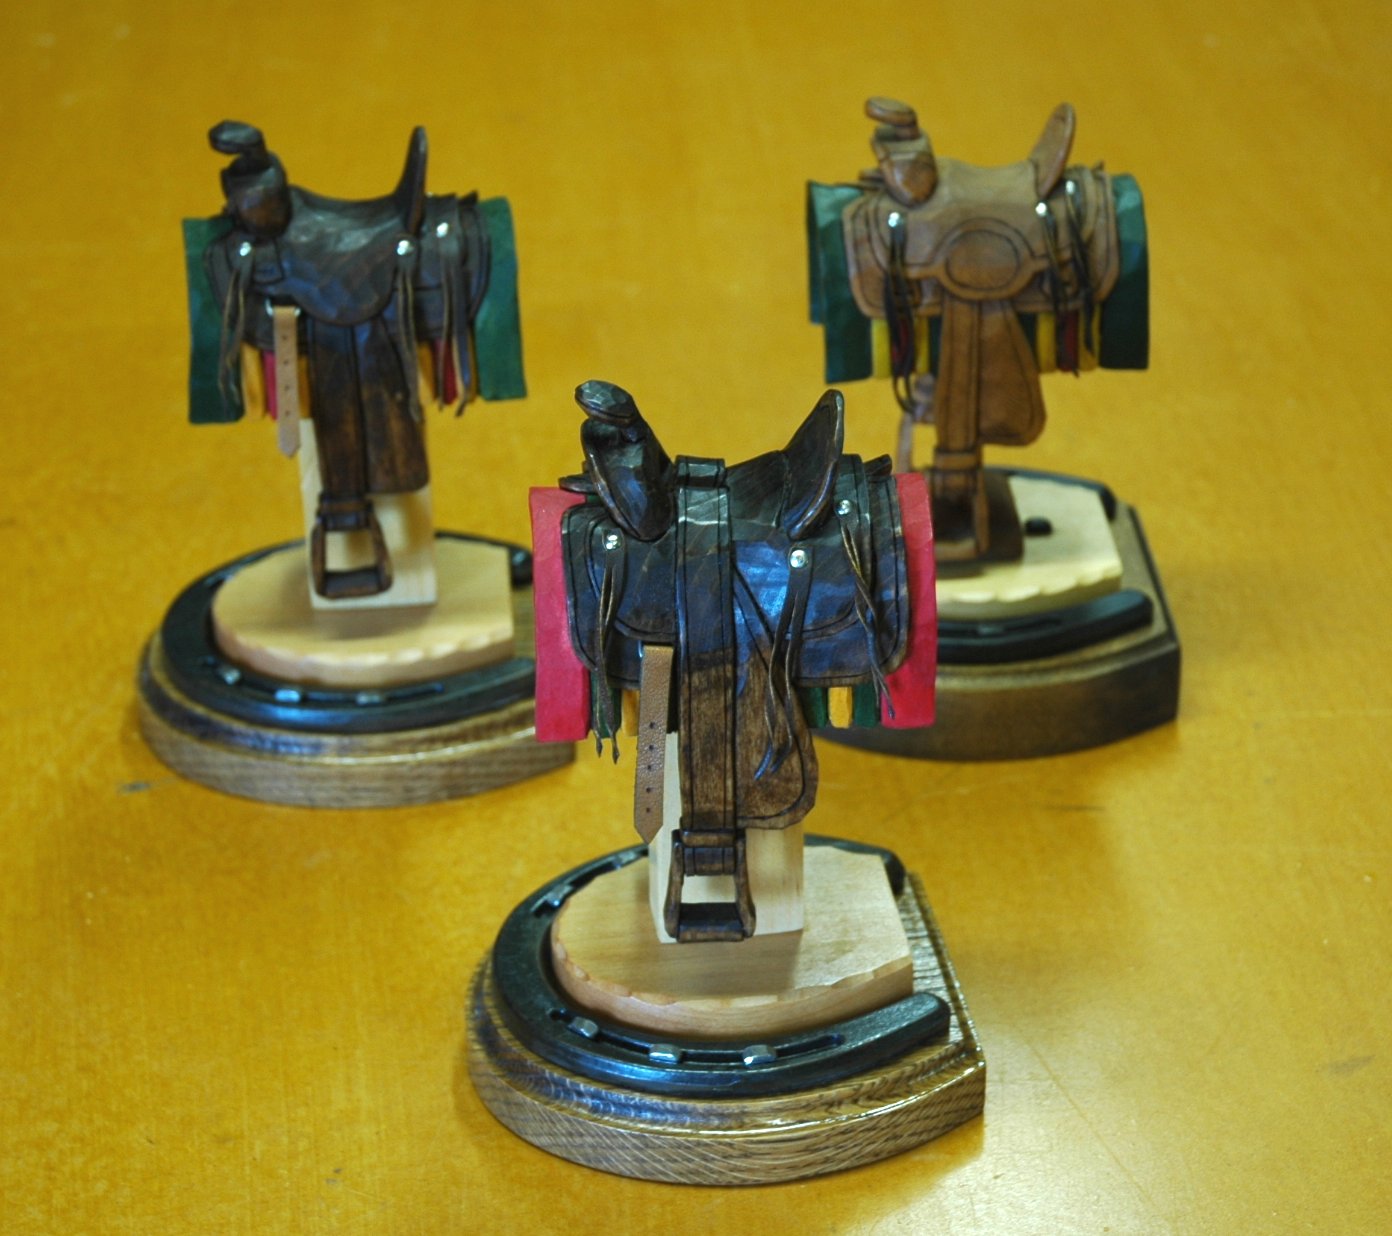
You can mount your Saddle many ways but this is how I make mine. Using a metal Pony shoe, easily found at a local Farm store, I first sand off the rough edges. Then, tracing the inner area as shown on a piece of 1/2″ Basswood, I cut the inner shape. For the outer shape I use a piece of 3/4″ Oak or Walnut. Once everything fits I stain only the bottom base and when dry varnish both wooden pieces. Mounting the horseshoe in place I mark the nail holes and predrill them for the nails. Make sure you use a drill smaller than the size of the nail to hold the metal shoe securely. I use regular, small horseshoe nails for an authentic presentation. You will have to snip off the ends of the nails so they do not extend beyond the other side of your base.
Using a small piece of wood that will raise the saddle off the surface of the base, I varnish it and then using a couple screws and wooden dowels I attach the saddle with wood glue.
And there you have it! One great representation of a piece of the Old West.