December 16, 2007
With the carving finished it’s time to get the paints out. It’s hard to put into words how to do a visual medium so I’ll take as many photos as I can as I work my way through these next steps. Just remember, it’s not too easy to paint “wet” while also stopping occasionally to take a photo.
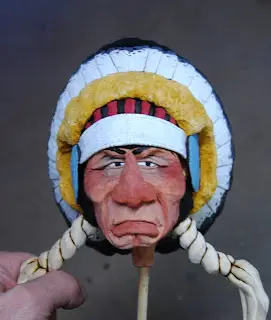
First, let me talk a moment about my views of flesh paint as I think a lot of carvers just destroy their work by applying the wrong skin colors. Take a moment and look at the skin on your hands. Do you see any white? If you do then it’s time you got up from that computer to go outside and get some sun! However, if you spend a lot of time outdoors like I do you’ll probably see the same colors that I do and there is no white in that mix except maybe on my backside but we’re not going to talk about that area. The best flesh to me is just a mixture of Red Iron Oxide and Yellow Ochre, at least for the techniques I use. For Native Americans I mix in more of the red. For us white folks I use a little more yellow and thin things down a bit. The important thing to remember is that the wood you’re applying the paint to also has a color that works to balance out those other two colors. If you put white in the mix then your figure will take on a pinkish appearance. Well, I’ve never seen a pink Indian or a pink Cowboy so let’s save the white for the feathers and the beadwork.
If you’re just beginning to use this “wet” technique of painting use thin washes at first and practice on a piece of scrapwood. You can always add more color as long as you keep your surface damp and those burn lines will keep the colors from crawling in the other areas and that’s a big help when your first starting out and working wet.
So….get your brushes, mix up some paint and have some fun.
Comments Welcome!